Good Morning Crafters!
This will be my last post for Fall projects this year (I think). I just love this little ornament. And you might not guess what the base is on this little guy. Take a look.
I actually started with a toilet paper tube. My preference would be a paper towel tube but I had this one handy to make a quick project. When I say quick, I mean quick. Of course the first one you make of anything always takes longer but, when I duplicate this one with a Christmas/Winter theme I'm estimating it will only take about 30 minutes or less to make. Did I say quick? I love the way this project came together. Here's a side view to see the dimension a little better.
To make this adorable ornament just wrap your designer paper around the tube and trim off the ends, don't fold to the inside. The paper will behave better if you roll it a bit in your hands before gluing to your tube. You could measure your paper too but, that would take extra time and we're doing quick, right? Although, I think you can get 4 of these out of one sheet of 12x12 paper. I recommend you use strong tape or wet glue for most of the gluing on this project. Sponge the edges of all your paper.
Next I added a paper ruffle with coordinating paper. I scored the ruffle paper strip (about 1-1/4" wide) at 1/4" and 1/2" alternately, exercised the folds then crumbled it all up and sort of followed the folds I made. I didn't want it to look "perfect". I just made the scoring lines so the paper would be a little easier to manipulate when making the ruffles. I glued the ruffle to the tube then stapled the tube shut on top of the ruffle. I then added a little strip of another
paper for a border to hide the unevenness of the top of the ruffle and the
staples.
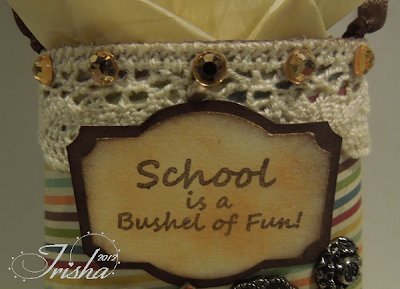
I used Scor-tape instead of red sticky tape (it can be a bit forgiving unlike the red stuff) to attach the lace at the top. Of course, all my seams are at the back. I added this cute sentiment from Create Your Classroom "Back To School" stamp set and punched it out with a fun shaped punch (SU). I cut the second layer by hand and attached the label with some foam tape at the bottom and more Scor-tape at the top over the lace.
The next step was to add some chipboard leaves which I inked up and made veins using my piercing tool. I also added a couple of metal button brads (SU). Next, I added the ribbon handle (started with about 12") by punching a hole in each side with my
Big Bite hole punch then tied a knot and glued the loose ends down
inside. I glued another coordinating paper to the inside of the tube to hide the loose ends of the ribbon and brad legs and inked the edges to give my project a more finished look. Here's another close look
After all this is done, I added the bling (seriously, this word needs to be in the dictionary!) all around. Bling is a bit like ribbon, you have to have a little on every project, right? Of course you do, don't be ridiculous! So, there you have it, my last Fall project for this year. Stop back soon for more Christmas and Winter projects. I can't wait to show you what I'm making!
I entered into theses challenges:
Hotshot Craft-#12-ends 11/29
I entered into theses challenges:


Totally love this project!! You amaze every time!!! ;)
ReplyDeleteGorgeous creation... Love all the fabulous detail! Simply Beautiful... Hugs May x x x
ReplyDeleteSuper cool project! I love it....must start saving the loo roll tubes!
ReplyDeletehugs